The Ikea Loveseat:
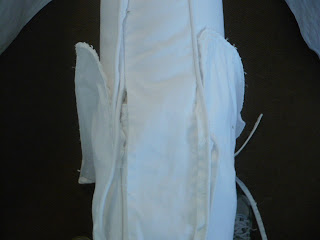
After all the furniture moving, I was analyzing the room trying to figure out how best to arrange the furniture and what we should do with the different pieces. Was the furniture in good enough condition to make getting a slipcover worthwhile? How should we position it? While observing the oversized chair, I realized that it had the same lines and looked as if it had the same dimensions as the Ikea sofa just shorter. I happened to have an extra Ikea loveseat slipcover in the room, so I slipped it over the oversize chair (okay, it wasn't that easy, there was LOTS of tugging and tucking) and to my amazement and delight, the two pieces did have the same dimensions. So, I tucked and tucked and tucked some more until I got the slipcover on the oversized chair looking pretty similar to that of the Ikea loveseat.
Comparison of the
Non-Ikea Chair Ikea Loveseat
Non-Ikea Chair Ikea Loveseat
The cushions were even the same dimensions; however, the problem was that the loveseat has two seat cushions and the oversized chair has one. I knew that I was going to have to sew together two of the loveseat cushions to create a custom cushion for the oversized chair. I looked at the oversized chair cushion--covered half-way with an Ikea cover--for a few days before tackling this project. Even though I had just spent countless hours learning about piping during my green chair reupholstry project, I still felt intimidated by this. However, this morning, I jumped in and tackled the cushion.
The Oversized Chair (Non-Ikea) with the Ikea Loveseat "Before"
Here's what I did:
1. I put the Ikea covers on the oversized chair cushions to figure out what I needed to do to make one big cushion. I knew that I wanted to keep one zipper, so I figured out where the cushions would join.
TIP: I am adding this tip AFTER I finished the project because I did not think of this until later on in the project and it was too late. Think about where all your seams will be. You will have two large seams running across the top and bottom of the cushions, but you'll also have side seams. It would be best to cut the fabric so that all the seams will line-up.
2. I picked one cushion which would lose the zipper, so from the side seam to the other side seam, I ripped out the middle/side section of the cushion along with the piping. On the other cushion, I did the same thing though I left the side section with the zipper and ripped out the remainder. When I took these pieces apart, I merely pulled out the seams, but left the pieces attached to the covers. I did make one cut on the second cushion where I was separating the side piece without the zipper, which enabled me to pull apart the cushion.
3. Once I was done dissecting the cushions, I put them back onto the oversized cushion.
4. There was far more fabric and cording that I needed, so I trimmed all the excess fabric and cording.
TIP: Before trimming the fabric and cording, decide where your seams will be and trim so that the seam on the side of the cushion will line-up with the seam on top.
5. Then I pulled the seams from the piping and exposed the cord so that I could join the piping.
6. Next, I began marking where I would sew the seams of the actual cushion and where the piping would be joined. (I used Disappearing Marker, which I first read about on Centsational Girl. It disappears within 24-48 hours.)
TIP: Remember to cut so that your seams will line-up on the side and top.
7. The project took a turn for the worse at this point. If you read this blog, you know I don't like to measure things and prefer eyeballing because it is quicker. And if you know this, it should be no surprise that I don't take the time to baste. I was, however, nervous about my eyeballing and decided to baste the top and bottom pieces. It is a good thing that I did! I had to go back six times, yes six and adjust my seams to make the cover more fitted. It's a real pain to put on and pull off a fitted cover for a cushion! Phew!
8. After the sixth adjustment, I decided that it would be good enough.
9. I first joined my piping on both sides. Then I sewed the sides together. Finally, I sewed the piping, sides and top and bottom together, which was the final step.
I tried my best to line everything up, but I hadn't cut with lining up the seams in my mind, so I'm afraid my cushion does not look as good as it should.
10. Voila--the finished product. Certainly not perfect, but it will do! Now, I need to figure out how to make the back cushion....
TIPS: Here are some things I learned during this very frustrating process.
- I should have completely disassembled the cushion leaving nothing but the zipper area in tact.
- The disappearing marker did not disappear on this Ikea canvas for some reason.
Carson


1 comment:
Great job, This content is very very great content, I got really good information from this content and it helps me a lot, I hope it can help many people like me.
wallpaper in abu dhabi
Post a Comment