Sunday, December 4, 2011

Orange Braised Chicken Thighs with Green Olives & Bulgur Wheat with Root Vegetables


It's the time of the year when people crave stews and roasts--comfort food that warms and nourishes.  It was with this in mind that I first made this meal several nights ago; I was so pleased with the result that I'm making it again.  The Orange Braised Chicken Thighs with Green Olives comes from Epicurious and is a simple dish for two.  The Bulgur Wheat with Root Vegetables is a recipe that I concoted that is also quite simple though you will do some peeling and chopping.

Bulgur Wheat with Root Vegetables
serves 2-4 
  • an assortment of root vegetables (I used 3 carrots, 1 very large turnip and a sweet potato because that is what I had on hand.  Butternut squash is also an excellent choice.)
  • olive oil
  • salt and pepper
  • cinnamon
  • 1 cup bulgur wheat (if you have never purchased this, you can pick-it-up somewhere like Fresh Market or Whole Foods)                                                                                                                                                                       

  1. Preheat your oven to 425. 
 2.  Peel and chop your vegetables.  It would be best to try to cut the root vegetables into pieces that are similar in size.
3.  Spread the vegetables on a large, rimmed baking sheet.
4.  Pour olive oil all over the vegetables.  Then cover them generously with salt, pepper and cinnamon.

5.  Mix this together--just use your hands--so that the olive oil and spices coat the vegetables.
6.   In a saucepan, bring 1 cup of water to a boil.  Then, remove from the heat, add 1 cup of bulgur wheat and put a lid on top.  (If you don't have a lid, put something on there--like a small baking sheet--to act as a lid.

7.   Put the vegetables into the oven and roast until tender--probably about 30 minutes though it will depend on how small you diced them.
8.  When the vegetables are done cooking, scrape them into a large bowl.  Uncover the bulgur wheat and toss the two together. 

While the vegetables are roasting, start on your chicken.   I've added notes, below, in red.
Orange Braised Chicken Thighs with Green Olives
  • 4 chicken thighs with skin  (I used skinless.)
  • 2 teaspoons olive oil
  • 3 large garlic cloves, minced
  • 1 medium onion, sliced thin
  • 1/2 teaspoon ground cumin (I am currently obsessed with Smoked Paprika and substituted it.)
  • 1/2 cup fresh orange juice
  • 1 tablespoon fresh lemon juice
  • 1/3 cup small pitted green olives

Preparation

Rinse chicken and pat dry. Season chicken with salt and pepper. In a heavy skillet heat oil over moderately high heat until hot but not smoking and brown chicken, transferring as browned to a plate.
Pour off all but about 1 tablespoon fat from pan. (You won't have a lot of fat if you use skinless and you probably won't need to saute the thighs for long.)  Reduce heat to moderate and in skillet cook garlic, stirring, until it begins to turn golden. Add onion and cook, stirring, until pale golden. Stir in cumin, citrus juices, and salt and pepper to taste and add chicken and olives. 

Simmer chicken, covered, 25 minutes, or until tender.


Bon Appetit!
Carson


Friday, October 14, 2011

Marseille-Style Shrimp Stew from Food and Wine


It has been 8 weeks since my daughter was born and in some ways, I'm glad to be back in the kitchen.  This week I'm making 3 meals from the new issue of Food and Wine, October 2011, which praises things French.  Last night we had Roast Beef with Root-Vegetable-and-Green-Peppercorn Salad, tomorrow we will have the Chicken Baked on a Bed of Bread and Swiss Chard and tonight, of course, we will be having the Marseille-Style Shrimp Stew.

Don't bypass Bon Appetit or Food and Wine because you think the recipes are too long or complicated for a weeknight.  Tonight's active time is 45 minutes, and it is 30 minutes for the other two recipes.  And, it doesn't have to be perfect.  It will still be good if you are missing an ingredient or two:-)

Here is the recipe with my pictures and comments:


  • 2 garlic cloves, minced
  • Salt
  • 1/2 cup mayonnaise
  • 1 teaspoon fresh lemon juice
  • 1/2 teaspoon paprika
  • Pinch of cayenne pepper
  • 3 tablespoons extra-virgin olive oil
  • 1 medium fennel bulb, cored and finely chopped
  • 1 onion, finely chopped
  • 4 garlic cloves, minced
  • Three 1-inch strips of orange zest
  • Pinch of ground cloves
  • 1/2 cup dry white wine
  • 1 cup bottled clam juice
  • 1 cup canned whole tomatoes, chopped
  • 1/4 teaspoon saffron threads, crumbled
  • Freshly ground pepper
  • 1 1/2 pounds jumbo shrimp, peeled and deveined
  • Toasted baguettes, for serving
  1. In a bowl, mash the garlic with a pinch of salt. Whisk in the mayonnaise, lemon juice, paprika and cayenne. Whisk in 1 tablespoon of the olive oil. Set the rouille aside. 
Comment:  I skipped the paprika because I didn't feel like digging it out of my spice cabinet.   And, I skipped the saffron in the next section for the same reason!


2.In a large, deep skillet, heat the remaining 2 tablespoons of oil until shimmering. Add the fennel and onion and cook over moderately high heat, stirring, until softened, 7 minutes. Add the garlic, orange zest and ground cloves and cook until fragrant, 1 minute. Add the wine and cook until nearly evaporated, 5 minutes. Add the clam juice, tomatoes, saffron and 1 cup of water and bring to a boil. Season with salt and pepper and simmer until the sauce is reduced by half, 10 minutes.

Comment:  I used ground cloves as I didn't have any whole cloves.  Here's a tip:  Don't dirty your kitchen by chopping up the whole tomatoes as the recipe suggests.  I like to put them into the pot and use my metal spatula to chop them.  Also, I used a zester, which sort-of grates the orange and put in far more zest than called for by the recipe.

3.  Add the shrimp to the skillet, cover and cook over moderate heat, turning once, until cooked, 5 minutes. Discard the zest. Spread the rouille on toasts and serve with the stew.

 Comment:  I accidentally purchased frozen "cooked" shrimp at Fresh Market though I meant to grab a bag of frozen raw.  Too often people stress if they cannot follow a recipe exactly.  Case in point, I've changed or omitted a  good bit of things about this recipe, measured nothing and I'm sure it will still be a fine meal for a weeknight.  I hope you'll give ones of these recipes a try! 


 Bon Appetit!
Carson

Wednesday, September 21, 2011

How to Reupholster a Stool


Earlier this year, I posted about two cross-bar stools.  At the time, I spray painted the legs black, but knew that I eventually wanted to recover them.  I am embarrassed to say that I never finished the post; therefore, I started where I had left-off finishing this project just prior to the birth of baby #2.  Though that was 6 weeks ago, I'm just getting around to publishing the post.
________________________________________________________________

My sister-in-law, who is an interior designer/owner of Kathryn Robertson, suggested that I get cross bar stools to put in front of my fireplace.  What a great idea!  Only....I could not find affordable upholstered stools.

I felt confident that I could find an alternative and found great stools for $60 each at Sears/Kmart. 
Not a bad deal!  I never liked the cherry finish, so I spray-painted them with high-gloss black Krylon spraypoint.  (Sorry-I deleted pictures of the stool!)

About two months ago, I was at U-Fab and spotted the perfect fabric for these stools, which I purchased, but they remained uncovered until last week.  In an effort to distract myself from the impending birth of baby #2, I decided to bite the bullet and recover the stools.  The process ended up being easier than I thought:

As with any reupholstry project, begin by deconstructing the furniture noting how the piece was put together.  Taking pictures is a good idea for helping you remember how to re-assemble the piece.

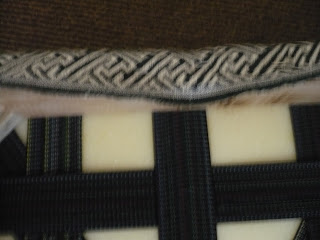
First, I removed the legs, then I removed the black fabric that lined the bottom of the stools.


Next, I used scissors and pliers to remove the leopard fabric.  The original stools were tufted, and when I began the reupholstry project, I thought I would tuft my stools, but ended-up deciding again it.  If your stools are tufted, pay careful attention to how the buttons are attached to the bottom of the stool.


 I tried to remove as much of the fabric and staples as I could, but it was difficult to get it all.
Next, I cut my two yards of fabric into two, one-yard pieces.  I centered the foam wrapped frame on top of the fabric (upside down) being sure to line-up the pattern--just eyeballing it.

Next I stapled a center staple on all for sides making sure to fabric had equal tension on all sides and that the pattern was straight.  Next, I added many staples to the sides until I got near the corners.

Decide how you want your fabric to fold at the corners--play around with it a bit--then pick a method for folding.  Use the same method for folding on every corner.


Be sure to cut back the fabric so that is doesn't cover the holes where you will re-attach the legs of the stool:

This project didn't take too long since I decided not to tuft the stools.

Here are the before and after stools pictured together:

After:


Thanks for reading!
Carson


Friday, August 12, 2011

Family Room Makeover, Part 4, Accesories


Since my baby is due in about a week, I thought I should go ahead and post my family room makeover even though I'm not quite finished.  
Since my palette was largely neutral consisting of khaki, brown, white and navy, I put considerable time into choosing the pillow fabrics.  I believe I went to every fabric store in Richmond and couldn't seem to find what I wanted!  Finally while browsing online, I found great fabrics from the Annie Selke collection at Joann's. Using two of the fabrics, I was able to pull in the robin's egg blue from the desk I had painted, the navy from the wall, the brown from the ottoman as well as the bright green I had hoped to add to the mix:


I purchased green fabric from U-Fab in Richmond to make the cording for some of the pillows and also bought navy indoor/outdoor fabric for four of the pillows.  (If you need a tutorial on making throw pillows, please see my post Easy Throw Pillows.)  One tip that I've learned is that it is usually less expensive to purchase pillows on sale at Target, Walmart, etc. than a pillow insert from the craft store.  I bought several regular priced pillows from Walmart (2 for $12) and then two larger rectangular pillow from a craft store to recover.  Here is the heinously ugly pillow from Hobby Lobby:

Here are some pictures of the finished pillows:


Next was the large expanse of wall above the sofa.  After much consideration, I decided I wanted three large prints or pictures in white frames, which I found at HomeGoods.  At the time of purchase, I wasn't sure that I would  want or use the prints but primarily wanted the frames and mats.  I figured I could put other pictures into the frames, but wanted to nab the frames and they were the "look" and size that I wanted.


The last thing I hope to do if make the table tops a little more attractive and finish the mantle, which is bare.

Total cost for makeover:
$35    paint
$87    window treatments
$ 4     plastic coral
$10    3 cans of white spray paint
$8      2 rolls of wrapping paper from Target
$10    packaging paper (white and brown) from Ben Franklin
$90    prints with frames from HomeGoods
$44    pillows (to be covered)
$64    fabric to cover pillows
_______________________________________________________
$ 352 total spent

I hope, one day, to add the finishing touches to this room, but it will be some time down the road.
Thanks for reading-
Carson