Tuesday, July 12, 2011

Easy Box Pleat Valances (Convert a Curtain Panel into a Box Pleat Valance)


Being that I had already sewn valances for the family room earlier this year and didn't like them, I knew that my husband would not be thrilled that I was making new ones quite so soon.  So...I thought that I should impress him by economizing.  (We'll see if it works!) I decided on white, box-pleat valances with navy grosgrain trim (for my family room renovation) and began shopping around for white fabric.  I found some great fabrics and prices, but I was going to need a good bit of fabric and trim.  In the June issue of House Beautiful, there is an article entitled "101 Finds From the Hardware Store."  In fact, it was in this article that I saw the Lucite pulls (from Lowe's) that I used on the dresser in the nursery.  The same article listed White Twill Curtains (Panels) from Lowe's for $11!!  That is, $11 for a 84 L x 40 W panel.  That is far less expensive than any fabric I had seen.  After taking some measurements, I decided that two panels would provide enough fabric to create a large box-pleat valance for a set of two windows.  I have five windows needing 3 valances total.

Go to Lowe's and purchase a 4 x 1 x ______ (length of board) inch board.  You will likely want the board to extend a few inches past your window on both sides.

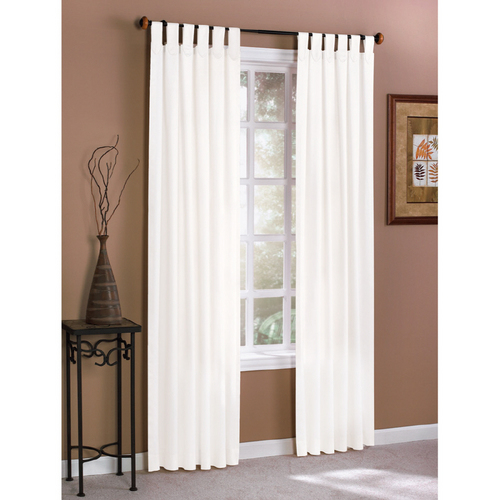
These curtains are VERY easy to sew.  You will need to sew only a few straight lines though you will need to do some measuring and pressing.  If you windows are more of a standard size, one panel will likely suffice for one window.  You needn't be limited to shopping at Lowe's for panels.  I think you could find panels at Target, Walmart, Bed, Bath and Beyond or any big-box store that would work for this project.  Make sure that the panels are all the same color though.  I had to return several panels to Lowe's that were obviously not manufactured in the same lot, so the color was slightly off.

You will be folding the panel in half, which will provide you with your face fabric (front fabric) and your lining (back fabric). Make sure you are comfortable with the thickness and weight of the fabric.  The panels from Lowe's are white "twill" and the weight and thickness worked perfectly for this project.  You need a fairly sturdy fabric for box pleats--something like silk or a gauzy fabric is not going to work well.  It needs structure.

I will provide a tutorial of how I made a valance for a single window, but if you want a more specific and "proper" tutorial, this is a good one:  http://www.diyideas.com/howto/sewing-fabric/boxvalance_1.html


Here are the materials you'll need:
  • Lowe's panel 40x84
  • seam ripper
  • measuring tape/yard stick
  • thread, pins, scissors
  • trim or ribbon, if applicable
  • iron
  • L-brackets
  • 4x1x____ inch board
  • staple gun and staples
  • screws and screwdriver
seam ripper

If applicable to your panel:  Use a seam ripper, to rip the seams that attach the tabs to your curtains. (The panels that I purchased from Lowe's were "tab-top"), so I needed to remove the tabs in order to get my flat piece of "fabric."

Regardless of the style you'll need your panels to lie flat and not have any pleating, tabs, etc.  You want a flat panel that looks like one big piece of rectangular fabric; however, do not remove the regular seams!  You want to keep those because they are one less thing you have to sew! If you have tabs, you'll need to rip where the tabs are sewn to the outside of the panel and where the tabs are sewn into the panel.  Afterwards, pin the areas back into place and sew a straight line--following the original seam--to close the areas where the tabs were sewn into the panels.


.
Once you have a large, flat panel.  Give it a good press with the iron.

Then lay it flat on the floor.  Fold it so that the side hems line up.  Pin the side hems together.  Then press the entire folded piece making a nice crisp edge that will be the bottom of the curtain.


Tip:  Iron "down" the curtain.  That is iron the fabric down towards the bottom fold away from the top hem and pins.  This will help to avoid the fabric bunching or being distributed unevenly.

If applicable, now is the time to attach the trim.  If you are making a proper valance, you wouldn't want the thread attaching the trim to be seen on the backside (lining) of the curtain; however, since these are "easy" valances, I didn't worry about this.  Here is what I did:
Decide the distance between the bottom edge of the valance and your trim.  To simplify matters, I used a 1 inch margin.  Then, pin your trim at this distance all the way across the bottom of your valance.  Be sure that a few inches of extra trim hangs over the edges....

Tip:  Be sure to smooth your trim as you go.  Make sure it is completely flat.  I had to go back and re-pin a section because I was worried that it would bunch when I sewed it to the fabric.


Take the extra trim that is hanging-over the edges and fold it several times so that the raw edges are enclosed in the trim and pin the over hand to the backside (lining) of the curtain.  See pictures:


Now it is time to sew your trim to the curtain.  I did not use a zipper foot, but used the regular foot.  Sew as closely to the edge of the trim as possible and, of course, use a thread that matches the trim.

The final step sewing step is creating the pleats.  Don't be intimidated by this.  In the most basic sense, you are making folds in a large piece of fabric until it fits nicely onto your pre-cut board.  I took an approximately 84 inch piece of fabric and folded it until it fit a 42 inch board.

Start by marking the half-way point on your board.  In my case 21 inches.

Next, use a pin to make the half-way point of your fabric.  In my case 42 inches.  At this point, it may help to look online or in your house at pleated curtains or upholstery so that you can understand how the pleats work. 
Make your center pleat by folding the fabric behind itself on both sides, see pictures.  Try to make each fold about the same size, like 4 inches:


Fold the fabric behind the half-way point on both sides making sure both folds in the pleat are about equal and make sure that the fold measures the same at the top and bottom of the curtain:

Once you are satisfied that the pleats are even, pin them in place:
Make sure that your curtain is laying flat in front of your board so you are able to see the center point on your board as well as  where the corner pleats should be made.  Now it is time to make the corner pleats.  Make these pleats the same way, but line up the corner pleat with the corner of your board.  Make the pleats and pin.  Try to make the pleats on both corners about the same size.  I would advise making the center pleat the largest and your corner pleats a bit smaller.  (For example, you might be making your center pleat 12 inches across and your corner pleats might be only 7 inches across or something like that.)  Play with your pleats and make your pleats fit the board.  Your corner pleats will depend on your board depth.  I purchased a 4x1x42 inch board.  These boards--after they are processed--are actually only 3.5 inches deep even though they are called "4" inchdes.  So my corner pleats were 3.5 inches on each side/fold of the pleat and 7 inches across.  See below.
Remember to ensure that your grosgrain or trim, if applicable, is lining up properly.

After you have securely pinned your pleats, it is time to sew the top of the valance.  I followed the seam already made in the curtains (about a 1 inch seam allowance) and just sewed straight across the top of the valance sewing the pleats into place.  See picture below:

(Sewing pleats into place)

Before you move onto the final step, you will want to press these curtains--well.  They are supposed to look crisp, so you will want to press them straight and press the pleats to be crisp.

The final step--not including mounting--is stapling the curtains to the board.  I always find this the most exciting part!  It is the last step for me as my husband is the one that mounts the valances to the L-brackets and hangs the treatments.
Start by lining up the middle pleat to the middle of the board and begin stapling.  Staples come in a variety of sizes and you will need longer staplers to go through the pleated fabric and secure the curtains to the board.

Staple across the top to make sure the curtains is very securely fastened.  You'll want to make sure you are stapling the curtains so that it hangs down the same distance across the board.  (I followed the seam that was on the original panel.)

As for the corners, these are a bit trickier.  Put your board on an ottoman or coffee table.  I have my three-year-old sit on the middle to hold down the board, and I let the end of the board hang off the end of the ottoman.  You want your pleat to fall right at the corner of the board.  I apologize for not having more pictures...

Mount your L-brackets and hang your valances from them.  We mounted the L-brackets to high--leaving just enough room for the board between the bracket and the molding--that I didn't even need to secure the valances.  I just slid them into the space.

As you can see the, initially the side pleats are flying-out a bit to the side....
  So, I used pins to make the pleats more structured:
I also made valances for my double windows.  The only difference in the process is that I sewed two panels together at the ends to make the fabric 40 x 168 and made three pleats in the front of each in addition to the two side pleats:


I did not save my receipts, but here is the estimated cost for my valances which covered five windows:
$55 for fabric (5 white twill panels from Lowe's)
$17 for my navy grosgrain trim (on sale at Ben Franklin)
$15 approximate cost of wooden boards
$0 for l-brackets, staples, thread, etc. which were supplies that I already had
______________________________
$87 for five custom valances!

In the world of custom curtains, I can safely say this is a deal.  It did take some time, but I believe it was well worth it.

xo-
Carson

    Saturday, July 9, 2011

    Painting an Antique Dresser for the Nursery (and Mirror)


    The latest project to have taken over our house is work on the nursery.  (I'm expecting #2--a girl!--in August.) 

    The dresser came from my husband's grandparents' house.  It is the perfect size and height to work as a changing table/dresser.  I decided to paint it white.  (Pregnant friends: please do not purchase a "changing table" for your child.  Simply buy a dresser new or used and attach a changing pad to the top.  It will look better and is probably better made than the changing tables marketed by the baby/pregnancy industry!)


    PAINTING THE DRESSER
    First, remove all the drawers and hardware.  Then, I lighted sanded the dresser and used a Swifer wipe to clean the surface followed by baby wipes.  Let dry.

    Once it was dry, I applied the first coat of paint.  It took four coats of semi-gloss white "trim"  paint (from Benjamin Moore) to cover the dresser.   Fortunately, I already had several cans of leftover trim paint, so I didn't need to purchase it. Note: This dresser already had a slick or sealed surface, which is why I did not prime it.  If you are painting unfinished wood or a piece that isn't very "slick", be sure to prime.)

    I spent several days painting the dresser without the drawers then did the drawers separately at a later date though using the same process.  Remember to remove the hardware (pulls) from the dresser before painting.

    Hint:  It is always better to do more light coats than fewer heavy coats.  The coats will dry more quickly and the paint will be less likely to run.  Always, check your work after you apply a coat and use your brush to wipe away and smooth-out any runs or drips.

    After I finished painting my dresser, I noticed that the inside of the drawers were in bad shape.  I cleaned them out and put one light coat of paint (same as the wall color in the nursery Benjamin Moore OC-136  "Celery Salt.")  I will likely line the drawers with scented drawer liners as well.  During my last pregnancy, I purchased these at Crabtree and Evelyn.

    As a final step, I replaced the wooden knobs with Lucite knobs from Lowe's.  These affordable pulls ($6.92) were featured in the most recent issue of House Beautiful "101 Things From the Hardware Store" (thanks for the reminder Kim!).

    I am very pleased with the end result!


    The mirror above the dresser is a bit of a DIY project albeit very simple.  I purchased the mirror from HomeGoods, and it was rather beat-up.  I decided to paint the geometric border green.  All it took was two coats of acrylic craft paint and voila!


    Thanks to my friends and family, I have many hand-me-down and new baby girl clothes that have filled the dresser!
    xo-
    Carson

    Tuesday, July 5, 2011

    Tomato Tart and other FavoriteTomato Recipes

    It's July and the farmers' market has tomatoes in abundance!  In celebration of this, I thought I would share my favorite recipes that use tomatoes as well as try a new tomato tart recipe for tonight's dinner.  


    Tonight's dinner is a simplified version of the tomato tart on David Lebovitz's blog
    For tarts like this, you really needn't stick closely to the recipe.  Since I'm tired and pregnant, I used a packaged pie crust and didn't measure anything.  I placed my store-bought pie crust in the tart shell and skipped ahead to step #5.   I'm sure you could use a regular pie pan if you don't have a tart shell; you won't get the tart look or be able to put as many tomatoes in the dish, though.
    French Tomato Tart
    One 9- or 10-inch (23-25 cm) tart
    Adapted from A Culinary Journey in Gascony
    Because this is ‘country-style’ fare, this tart is open to lots of interpretation. For those of you with tart dough “issues”, you can make this either free-style or in a fluted tart ring with a removable bottom. Kate didn’t let the dough rest, but simply rolled it out, transferred it into the tart ring, and ran the rolling pin over the dough to neatly shear away the edges.
    If you wish to make a free-style tart, roll the dough out to about 14-inches across, then transfer it to a baking sheet lined with parchment paper or a silicon baking mat. Assemble the tart, leaving a 2-inch (5 cm) border, which you’ll then fold up to enclose the tart.
    Depending on the size of your pan, you may have a bit of dough leftover. We used it to make a few mini-tartlets, which we enjoyed later than evening with our aperitifs.
    Tart Filling
    One unbaked tart dough (see recipe, below)
    Dijon or whole-grain mustard
    2-3 large ripe tomatoes
    2 tablespoons olive oil
    salt and freshly ground pepper
    two generous tablespoons chopped fresh herbs, such as thyme, chives, chervil, or tarragon
    8 ounces (250 g) fresh or slightly aged goat cheese, sliced into rounds
    Optional: 1 1/2 tablespoons flavorful honey
    Tart Dough
    1 1/2 cups (210 g) flour
    4 1/2 ounces (125 g) unsalted butter, chilled, cut into cubes
    1/2 teaspoon salt
    1 large egg
    2-3 tablespoons cold water
    1. Make the dough by mixing the flour and salt in a bowl. Add the butter and use your hands, or a pastry blender, to break in the butter until the mixture has a crumbly, cornmeal-like texture.
    2. Mix the egg with 2 tablespoons of the water. Make a well in the center of the dry ingredients and add the beaten egg mixture, stirring the mixture until the dough holds together. If it’s not coming together easily, add the additional tablespoon of ice water.
    3. Gather the dough into a ball and roll the dough on a lightly floured surface, adding additional flour only as necessary to keep the dough from sticking to the counter.
    4. Once the dough is large enough so that it will cover the bottom of the pan and go up the sides, roll the dough around the rolling pin then unroll it over the tart pan. “Dock” the bottom of the pastry firmly with your fingertips a few times, pressing in to make indentations.
    If making a freestyle tart, simply transfer the dough to a prepared baking sheet (see headnote); no need to make indentations with your fingers.
    5. Preheat the oven to 425ºF (218ºC). See note.
    6. Spread an even layer of mustard over the bottom of the tart dough and let it sit a few minutes to dry out.
    7. Slice the tomatoes and arrange them over the mustard in a single, even layer. Drizzle the olive oil over the top.
    8. Sprinkle with some chopped fresh herbs, then arrange the slices of goat cheese on top. Add some more fresh herbs, then drizzle with some honey, if using.
    (If baking a free-form tart, gather the edges when you’re done, to envelope the filling.)
    9. Bake the tart for 30 minutes or so, until the dough is cooked, the tomatoes are tender, and the cheese on top is nicely browned. Depending on the heat of your oven, if the cheese doesn’t brown as much as you’d like it, you might want to pass it under the broiler until it’s just right.

    Pictures of my simplified tart:


     *********************************************************************************
      My mother made this tart for the first time years ago, and it is always it a hit.  My husband loves it.  It's from Better Homes and Gardens and is quite simple to make.


    A tomato recipe that takes a bit of elbow grease, but makes a stunning presentation worthy of company is the mozzarella filled tomato from Bon AppetitA great first course.


    In the summertime, there is nothing better than a tomato sandwich comprised of the basics:  bread, tomatoes, salt, pepper and mayonnaise.  Homemade mayonnaise, however, will take your sandwich to the next level.  Here is a very simple (five minute--if that!) recipe for homemade mayonnaise that my mother gave me:

    Easy Homemade Mayo

    1 egg
    1/2 teaspoon Dijon mustard
    1/8 tsp salt
    1 TB fresh lemon juice
    3/4 cup canola oil

    Put first four ingredients in blender and blend until smooth.  With blender or Cuisinart running, add the canola oil.  Process until smooth and creamy.

    Makes 3/4 cup.  Store in refrigerator up to 5 days.

    Bon Appetit!
    Carson