Showing posts with label spray paint. Show all posts

Friday, July 26, 2013

How to Make an Upholstered Stool (From an Accent Table)


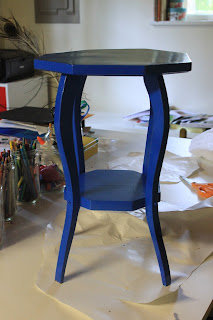
This is a project that can easily be completed in an afternoon.  In fact, on a whim I decided to convert this stool to an accent table and was lucky enough to have all the supplies on hand!

The accent table was from my husband's grandfather's house.  When we first acquired it, I simply spray painted it white though quickly grew bored of that.  You can read the post here.


Here is what I did to transform this accent table to an upholstered stool:

Supplies:
spray paint
less than 1/2 yard fabric
grosgrain ribbon (probably about a yard)
decorative nail heads
foam
paper for tracing top of table
scissors
staple gun and staples
glue gun and glue or just regular glue


1) Spray paint your piece.  Make sure to turn it upside down and get all angles.  Make sure to apply thin layers and allow ample drying time between each.  Depending on where you live, this time of year can be difficult because of the humidity.


2)  Turn over your stool onto a piece of paper and trace the top.  Add about an inch all the way around the pattern.  (I forgot to do this!  Mine still turned-out okay, but it would have been better with additional padding.)  I used three inch foam.  I pinned the pattern to the foam, then cut out the foam with scissors.


3)  Glue the foam to the top of the table and let dry.  (I used a glue gun.)


4)  Lay your fabric face-down on the floor.  Center the stool top (that is, have the stool upside down) atop the fabric.   Trim your fabric so that it is about 5 inches wider than your stool top.  Fold the fabric up to cover the foam and staple it under the table top.  Do this on each side.  Pay attention to the tension of the fabric and how it compress the foam.  Play with the fabric and folding it at the corners until you get it the way you'd like it to look.  Once you have the fabric a tight as you'd like it, add staples under the stool/table top.


5) I decided to add grosgrain trim and nail heads.  After selecting a trim color,  I used the glue gun to glue the trim to the fabric.  Once that tried, I hammered the nail heads in; it takes a bit of practice to nail them in a straight line.


6) Voila!  The finished product:


Thanks for reading!
Carson

Wednesday, September 21, 2011

How to Reupholster a Stool


Earlier this year, I posted about two cross-bar stools.  At the time, I spray painted the legs black, but knew that I eventually wanted to recover them.  I am embarrassed to say that I never finished the post; therefore, I started where I had left-off finishing this project just prior to the birth of baby #2.  Though that was 6 weeks ago, I'm just getting around to publishing the post.
________________________________________________________________

My sister-in-law, who is an interior designer/owner of Kathryn Robertson, suggested that I get cross bar stools to put in front of my fireplace.  What a great idea!  Only....I could not find affordable upholstered stools.

I felt confident that I could find an alternative and found great stools for $60 each at Sears/Kmart. 
Not a bad deal!  I never liked the cherry finish, so I spray-painted them with high-gloss black Krylon spraypoint.  (Sorry-I deleted pictures of the stool!)

About two months ago, I was at U-Fab and spotted the perfect fabric for these stools, which I purchased, but they remained uncovered until last week.  In an effort to distract myself from the impending birth of baby #2, I decided to bite the bullet and recover the stools.  The process ended up being easier than I thought:

As with any reupholstry project, begin by deconstructing the furniture noting how the piece was put together.  Taking pictures is a good idea for helping you remember how to re-assemble the piece.

First, I removed the legs, then I removed the black fabric that lined the bottom of the stools.


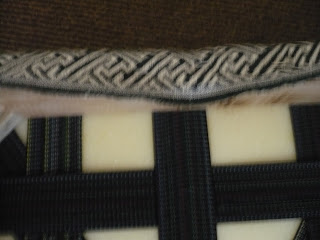
Next, I used scissors and pliers to remove the leopard fabric.  The original stools were tufted, and when I began the reupholstry project, I thought I would tuft my stools, but ended-up deciding again it.  If your stools are tufted, pay careful attention to how the buttons are attached to the bottom of the stool.


 I tried to remove as much of the fabric and staples as I could, but it was difficult to get it all.
Next, I cut my two yards of fabric into two, one-yard pieces.  I centered the foam wrapped frame on top of the fabric (upside down) being sure to line-up the pattern--just eyeballing it.

Next I stapled a center staple on all for sides making sure to fabric had equal tension on all sides and that the pattern was straight.  Next, I added many staples to the sides until I got near the corners.

Decide how you want your fabric to fold at the corners--play around with it a bit--then pick a method for folding.  Use the same method for folding on every corner.


Be sure to cut back the fabric so that is doesn't cover the holes where you will re-attach the legs of the stool:

This project didn't take too long since I decided not to tuft the stools.

Here are the before and after stools pictured together:

After:


Thanks for reading!
Carson


Sunday, August 7, 2011

Family Room Makeover, Part 3, Decorating and Organizing the Bookcase


 *****************************************************************
Painting the bookcases did not take a inordinate amount of time.  I took a little short-cut and left the shelf holders in place simply painting around them.  The challenge with these shelves was making them look nice as they need to be functional (housing items used in the family room) holding toys and ugly books (the nice books are in the library!)


Based on pictures I had seen online and in magazines, I decided that I wanted most of the decorative elements on the shelves to be white to create a nice, crisp contrast with the navy background.  So, in my usual fashion, I grabbed a few cans of gloss white Krylon spray paint and spray-painted a random mix of picture frames and items with "good lines".


On a DIY blog, I had seen someone spray paint cheap "coral" from the fish section of the pet store.  I wish I could remember where I had seen the post so I could give due credit. 
Decorative Coral from Pottery Barn


Supplies for my DIY coral

The coral was under $4 and is plastic instead of ceramic.  This is a good thing if you have a four-year-old--believe me.  One can of spray paint was under $3, and I certainly didn't use it all.

Finally, I covered a bunch of books and photo albums with a mix of wrapping paper and packaging paper (white and brown).  I forgot to take pictures of this project, but you can find tutorials for "how to make a book cover" online.


After being involved in a conversation at a child's birthday party today where the topic of conversation was how blogs are staged and give the illusion of domestic perfection and tranquility, I decided to add the following image.  The bookcase and family room is not always neatly assembled; we  use this room every day.  Here is a pick behind the sofa at the bottom shelves of the bookcase:


BEFORE

AFTER
I spray painted vases, book ends, coral, frames, made covers for all of the books, used my mother's childhood globe and a hammered brass beverage holder that my mother-in-law was throwing away to decorate.  Also, I took two of my mother's discarded watercolor paintings, which I think are great, and matted and framed them.  (You can see them on the second shelf from the top.)  I may go back and spray paint that brown box white...


Total cost of Family Room Makeover:
$35    paint
$87    window treatments
$ 4     plastic coral
$10    3 cans of white spray paint
$8      2 rolls of wrapping paper from Target
$10    packaging paper (white and brown) from Ben Franklin
_______________________________________________________
$154  total spent

The next installation of the makeover will be accessories.
Thanks for reading!
Carson

Tuesday, May 10, 2011

Spray Painting a Side Table


Once again I'm posting about a piece of furniture that we received from my husband's grandparents' home: a small side table.  There is not much to write.

I took this table and spray painted it gloss white.  I used spray paint primer then many, many light coats of gloss white.  (Be sure to remember to flip over the table to get the back of the legs and a few coats underneath.)  As a final step, I finished the table by spraying it with a protective enamel coat.

Before:


After:
Remember, these days you can spray paint just about anything.  If something has "good lines", it has potential to be reinvented with spray paint!

Happy Spray Painting!
Carson

Saturday, January 15, 2011

Spray Painting Goodwill Lamps

Last week, I saw Russet Street Reno's (http://www.russetstreetreno.com/search/label/Spray%20Paint)  post on spray painting end tables and lamps from Goodwill.  Her lamps and tables look great!

I'm working on a very low budget make-over for our master bedroom and think that spray painting lamps from goodwill is a great idea.  My lamps were not exactly the shape that I was looking for, but they'll do.   And at $6.25 a piece, the price was right.  I decided that I would paint these lamp gloss white.

Here's what I did:
  • First, I took a swifer dry cloth and wiped down the lamps.  

  • Then I took paper towels and stuff them in the opening where the light bulbs go. 

  • I primed the lamps with a spray on primer.  I like Krylon spray paint.  

  • Then I start applying many layers of the white gloss.  I did, I admit, make an sophomoric mistake and want to warn you so that you do not do the same thing.  It is always best to apply many LIGHT layers of spray paint, and do not spray too close to the lamp or you will get an ugly mess.  I applied too much paint to closely on one of the lamps and created a mess!  That side will have to serve as the backside of the lamp!
  • Buy a shade (there are affordable drum shades at Target and Walmart) and: Voila!  You're done!
(pictures of finished project to come.....)