Thursday, January 27, 2011

Winter Greens Salad with Sugared Walnuts, Crispy Pears and Pomegranate


For Christmas my mother-in-law gave me the cookbook, Clean Food by Terry Walters.  I haven't read it page-for-page, but I've read enough to know it is chocked full of good information and ingredients. In the introduction, she illustrates how processing food changes its nutritional value using oats as the example listing the foods from least processed to most processed and most  nutritious to  least nutritious, respectively.

Most Nutritious: Whole Wheat Groats--Steel Cut Oats--Rolled Oats--Quick Cooking Oat--Instant Oatmeal--Cold Cereal :Least Nutritious.  She also, in Michael Pollan style, gives some food rules to eating healthy (pg. 7):
EAT
All the Colors of the Rainbow
All Five Tastes
A Varied Diet
Locally Grown, Seasonal Foods
Enjoy Your Food and Mealtime

Throughout the introduction, she discusses which foods have the highest nutritional value and presents an interesting section on journaling what one eats in an attempt to see how the food one consumes affects energy levels and how one feels during different times of the day.

I've made a few of the recipes, but especially like the
Winter Greens Salad with Sugared Walnuts, Crispy Pears and Pomegranate
Though the recipe doesn't call for Blue Cheese definitely add some Blue Cheese, Stilton or Gorgonzola!

Even if you are not into "health food" so to speak, this is a really good salad!  Let me know what you think if you end up trying it!
xo-
Carson

Wednesday, January 26, 2011

Decorating with (inexpensive) Maps

I love maps (the Historian in me), could look at them for hours and adore homes that feature maps in the decorating...

I tore out the picture of this boy's room by Barbara Westbrook that was featured in Traditional Home several years ago.


I found a map at a cute  boutique (I wish I could remember the name of the shop) when visiting my brother and sister-in-law in Birmingham.  Actually, it was high-end gift wrap.  I purchased two knowing that I would use one in my son's room on the wall behind/above his bed.
 I've been wanting to find more to hang on his wall (it's a bit bare), and I came across this website today, which sells Map gift wrap.   It's called a Touch of Europe.  The best part is that these "maps" are $4.50 each.  I've even heard of people using this gift wrap to wallpaper their walls.

Think of the possibilities.  You could order and frame some of the "Flora and Fauna" pictures for instant wall decor!


After I originally posted this blog, I heard from Leigh, a friend of mine, who blogged about about wallpapering her son's room.  Way to go Leigh!! You've got to see this:


You can see the project in its entirety on this blog: Impress Your Kids


I'll post more pictures after I add more maps to W.'s wall!
xo-Carson

Tuesday, January 25, 2011

Spring Inspired Items on Etsy

I'm spending the last few minutes before preschool pick-up perusing Etsy for cute Spring inspired items.  Why can't it be spring?!  Check out these spring finds:


Etsy has the best throw pillows....

Love, love, love this pillow and would like two for my house though I would like to try to make them myself

From the Bolster Queens


And for the body....

From NoPlainT's

From Textile Monster

Sunday, January 23, 2011

Converting an Ikea Slipcover to fit a Non-Ikea Chair

We recently inherited a cool, mid-century sofa from my husband's grandparents' home.  As a result of this acquisition, we moved our Ikea loveseat down to our family room, which houses most of our hand-me down furniture.  In this room, we also have an oversized chair that my sister-in-law gave us and the matching ottoman and another old loveseat.

The Ikea Loveseat:

After all the furniture moving, I was analyzing the room trying to figure out how best to arrange the furniture and what we should do with the different pieces.  Was the furniture in good enough condition to make getting a slipcover worthwhile?  How should we position it?  While observing the oversized chair, I realized that it had the same lines and looked as if it had the same dimensions as the Ikea sofa just shorter.  I happened to have an extra Ikea loveseat slipcover in the room, so I slipped it over the oversize chair (okay, it wasn't that easy, there was LOTS of tugging and tucking) and to my amazement and delight, the two pieces did have the same dimensions.  So, I tucked and tucked and tucked some more until I got the slipcover on the oversized chair looking pretty similar to that of the Ikea loveseat.

Comparison of the
Non-Ikea Chair                                Ikea Loveseat

The cushions were even the same dimensions; however, the problem was that the loveseat has two seat cushions and the oversized chair has one.  I knew that I was going to have to sew together two of the loveseat cushions to create a custom cushion for the oversized chair.  I looked at the oversized chair cushion--covered half-way with an Ikea cover--for a few days before tackling this project.  Even though I had just spent countless hours learning about piping during my green chair reupholstry project, I still felt intimidated by this.  However, this morning, I jumped in and tackled the cushion.

The Oversized Chair (Non-Ikea) with the Ikea Loveseat "Before"


Here's what I did:
1.  I put the Ikea covers on the oversized chair cushions to figure out what I needed to do to make one big cushion.  I knew that I wanted to keep one zipper, so I figured out where the cushions would join.
TIP: I am adding this tip AFTER I finished the project because I did not think of this until later on in the project and it was too late.  Think about where all your seams will be.  You will have two large seams running across the top and bottom of the cushions, but you'll also have side seams.  It would be best to cut the fabric so that all the seams will line-up. 


2.  I picked one cushion which would lose the zipper, so from the side seam to the other side seam, I ripped out the middle/side section of the cushion along with the piping.  On the other cushion, I did the same thing though I left the side section with the zipper and ripped out the remainder.  When I took these pieces apart, I merely pulled out the seams, but left the pieces attached to the covers.  I did make one cut on the second cushion where I was separating the side piece without the zipper, which enabled me to pull apart the cushion.


3.  Once I was done dissecting the cushions, I put them back onto the oversized cushion.
4.  There was far more fabric and cording that I needed, so I trimmed all the excess fabric and cording.
TIP:  Before trimming the fabric and cording, decide where your seams will be and trim so that the seam on the side of the cushion will line-up with the seam on top.


5.  Then I pulled the seams from the piping and exposed the cord so that I could join the piping.
6.  Next, I began marking where I would sew the seams of the actual cushion and where the piping would be joined.  (I used Disappearing Marker, which I first read about on Centsational Girl.  It disappears within 24-48 hours.)
TIP: Remember to cut so that your seams will line-up on the side and top.

7.  The project took a turn for the worse at this point.  If you read this blog, you know I don't like to measure things and prefer eyeballing because it is quicker.  And if you know this, it should be no surprise that I don't take the time to baste.  I was, however, nervous about my eyeballing and decided to baste the top and bottom pieces.  It is a good thing that I did!  I had to go back six times, yes six and adjust my seams to make the cover more fitted.  It's a real pain to put on and pull off a fitted cover for a cushion!  Phew!

8.  After the sixth adjustment, I decided that it would be good enough.

9.  I first joined my piping on both sides.  Then I sewed the sides together.  Finally, I sewed the piping, sides and top and bottom together, which was the final step.

I tried my best to line everything up, but I hadn't cut with lining up the seams in my mind, so I'm afraid my cushion does not look as good as it should.


10.  Voila--the finished product.  Certainly not perfect, but it will do!  Now, I need to figure out how to make the back cushion....


TIPS:  Here are some things I learned during this very frustrating process.
  1. I should have completely disassembled the cushion leaving nothing but the zipper area in tact.
  2. The disappearing marker did not disappear on this Ikea canvas for some reason.
xo-
Carson

Better Than The Pizza Parlour Pizza

My family eats homemade pizza just about every weekend.  It is incredibly easy to make.  I realize this post is long and the recipe may look complicated.  It is not.  This wordy post is an attempt to thoroughly explain the process for those who are making homemade pizza, and crust, for the first time.  If you make your own pizza and crust, I promise you will never want to eat or pay for delivery pizza again! 

I have a good friend, Gina, who is an expert bread-maker and DIYer, so I have incorporated some of her tips into my recipe.


Better Than The Pizza Parlor Pizza

Ingredients for Crust:
3 cups flour
1 package rapid rise yeast
3/4 teaspoon salt
2 TB olive oil
1 cup water

Ingredients for the pizza toppings:
(These depend, of course, on what type of pizza you'd like.  Here is what I'm using tonight, which is solely based on what is in my refrigerator!)
garlic
olive oil
oil-packed sun dried tomatoes
spinach
mozzarella
goat cheese

Other items you'll need for this version of the recipe, but are not all required to make a good pizza:
Saran Wrap
Large Metal Bowl
Food Processor/Cuisinart
Pizza Stone
Parchment Paper
Large, flat cookie sheet
cast-iron skillet and ice


1. I use the recipe from the Fleischmann's Yeast website called Food Processor Pizza Dough:
http://www.breadworld.com/Recipe.aspx?id=146
Follow the recipe exactly.  It's very simple; you simply mix everything in the food processor.  When I make the dough, I always seem to add a bit more water.  You want your dough to tacky, but not so sticky that you can't get it off of your hands.


2.  Coat a metal bowl in cooking spray and drop the dough into it.  Spray a long piece of Saran Wrap with cooking spray and completely cover the dough.   Let rise in a warm place.  I put my bowl on top of the stove and turn the vent lights on, which gets it nice and warm.  Let rise at least 40 minutes, but I usually let the dough rise for over an hour.


3.  After 40 minutes....Your dough should be ready.  Turn, on your oven as high as it will go.  (Gina informed me that this is the key to making good pizza.  Apparently, there are websites dedicating to breaking one's oven code in order to make home ovens reach insane temperatures.  I haven't done anything that extreme, but can get my oven to 525, which normally means a tremendous amount of smoke as it desperately needs to be cleaned!)  Now turn out the dough.  You'll want to handle it the least amount possible.  Plop it down in the middle of a large piece of parchment and shape into a circle.  Put your pizza stone in the oven and make sure it heats up with the oven!


TIP: I find one problem with homemade pizzas is that they are soggy.  This is in part due to the crust and the oven not being set high enough, but also to watery vegetables and too much pizza sauce.  I do not use marinara sauce, but instead use olive oil and garlic.  Okay, I used marinara once recently, but used it sparingly.

4.  Then add your toppings starting with your olive oil and garlic.  I usually put spinach down next, followed by onions and ending with cheese, of course.

5.  Tonight I'm trying something new with the crust.  Gina also told me that when making homemade bread, she puts a cast-iron skillet full of ice under the bread, which gives in a nice crust, so I'm going to try that with my pizza crust.  Put your cast-iron skillet on the bottom rack and your pizza stone should be on the upper.

6.   Lift the parchment paper (or slide the parchment paper onto the cookies sheet) and place it on the pizza stone.  To be clear, your pizza does not touch the pizza stone; the parchment serves as a barrier between the two.

7.  Cook on high heat for about 20 minutes.  Actually, I have no idea how long to tell you; it will depend on your oven temperature.  Periodically check on it and lift the edge of the pizza so you can tell how the crust it cooking.

Voila!  Your made from scratch pizza is less expensive, better tasting and healthier than any delivery pizza you could order.  Now pour yourself a large glass of vino and enjoy!

xo-
Carson

Belmont Butchery

For those of you who live in Richmond, if you have not been to the Belmont Butchery,  you must.  It has the best selection of meat in town, and the staff can get you just about anything you need with enough warning, plus it's been in Food and Wine magazine twice!   Food and Wine article


Tonight, I'm noshing on Duck and Mango Pate.  A pretty penny, but well worth it.  Actually, if you buy a small amount like I did (1/4 lb.), it is less expensive than artisan cheese.


My absolute favorite item from the butchery is its hotdogs--divine, all beef wonders.  I dream about these dogs! 


The butchery offers free-range and pasteured animals, a wide selection of meats and pates as well as cheese, wine, bread and to-die-for brownies to name a few.  Below, Stilton and Amish butter from the butchery:


xo-
Carson

Sweet Cherry Tart

We have friends coming for dinner tonight and are keeping it casual.  Yesterday, I met a friend for lunch at Whole Foods, and I decided that I would grab some puff pastry and some fruit to create a dessert.  I hadn't put any thought into the dessert--this was a last minute dinner--and didn't want to have to go to the store again today.  I ended up with 2 pounds of sweet cherries and was sort-of dumbfounded as to why I had chosen them.  They were out of season which meant they were expensive b/c they were imported from Chili.  I always try to buy in season and local, so again, I'm not sure why I did this.  If I had to surmise, I would think that it had to do with the fact that my three-year-old was with me and the store was packed because it was lunch time.  Nevertheless, here is the recipe I concocted. It would be better in the summer time when there is an abundance of fresh, seasonal fruit; any fruit could be used in the place of the cherries and any jam could replace the cherry preserves. Again any measurements listed are guesses!:


Sweet Cherry Tart
Serves 4-6
Takes about 30 minutes to make


Ingredients:
2 lbs sweet cherries, seeded
1 8 oz package cream cheese
1 sheet of puff pastry (2 usually come in a package)
4 TB confectioner's sugar
4 TB cherry preserves
1 TB Chambord (optional)

Before you make the tart: Thaw puff pastry on counter (this won't take but about an hour).  Also leave the cream cheese on the counter so it can soften.

Unfold the pastry onto a baking sheet and use a rolling pin and roll a bit thinner into a square or rectangle.  Use a knife and cut about 1/2-1 inch from each side of the pastry.  Don't pick up the piece you cut off, but flip it onto the pastry.  Repeat this on each side and you'll have a little ridge or crust all the way around the tart.  Cover with foil and put baking beans on it.*  And cook on 375 for about 20 minutes--this is not precise.  Keep an eye on it and remove it from the oven when it is nicely browned.  Oh, and most people beat egg white and a little water and spread it on top.  I forgot and skipped this step, but it will keep your pastry from becoming too brown.  What can I say?  I'm a lazy cook these days.

While the pastry is cooking: 

Mix about 4 TB cherry preserves with 1 TB or so Chambord--set aside.

With an electric mixer, beat cream cheese wtih 4 TB (or more to get the sweetness you desire) of confectioner's sugar into the cream cheese.

Remove tart from heat and let cool.  Put dollops of the cream cheese all over the tart and then try to spread the dollops together to make a nice layer.  Then spread the preserve mixture on top of that.  Finally, put your pitted cherries all over the tart.

Voila!  You're done.  Simple, right?  Certainly better for summer time, but it will do!

*(When I used the beans in this way, it didn't work.   The beans are supposed to hold down the pastry so it doesn't inflate like a balloon, but my beans were puny.  I pulled the cookie sheet from the oven and used a clean dish towel to push down the pastry and deflate it.  This worked fine.  The middle was still not quit done so I put it back in at 400 for 5 or so minutes.

Tuesday, January 18, 2011

Reupholstering the Green Chair


I love this chair.  My parents bought it when they were first married; I remember it always being in their house. Recently, I asked if I could have it because I thought it would look good in our den.  It had been living in a back bedroom, so they were okay parting with it. I really do like it just as it is...HOWEVER, I wanted a new DIY project, and there is some staining on the cushion....so I decided to take the plunge and try my hand at reupholstering.  Don't get me wrong; I was completely intimidated by this project, but was inspired by my favorite blogger, Kate, otherwise known as Centsational Girl: http://www.centsationalgirl.com/


This past weekend Kate changed this chair, from this:


To this:


Here's How I Reupholstered My Green Chair:

DECONSTRUCTION
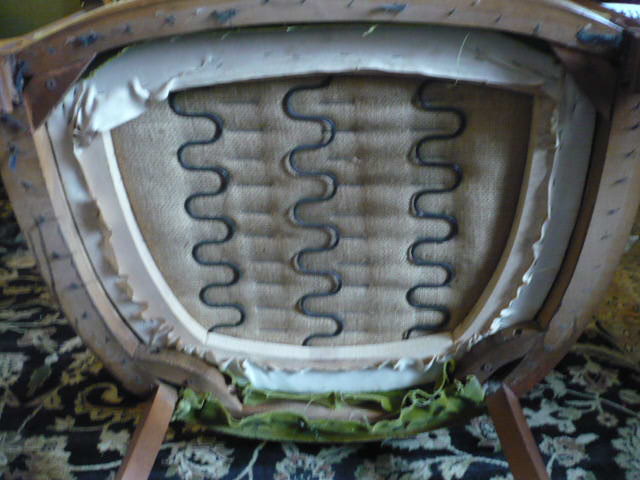
  • First, you will need to deconstruct the chair.  You should probably allow 1-2 hours for this step.  I flipped over my chair and found black cloth covering the bottom, which was stapled to the chair.   

  • I pulled off the black and removed a handful of the staples.  *Important:  I took pictures of each step and wrote down a description of each step in order to help me put the chair back together!  After removing the black fabric, I gained a real understanding of how the chair was constructed.  I found found four screws (one at each corner.)  Once I removed these, the chair "cover" popped out.  


  • Then I ripped off the cording all over the chair which was attached with glue followed by the fabric.  The fabric was a bit more difficult to remove.  I used a flat-head screwdriver and pliers to remove as many staples as possible.  This took a good bit of time--boy was my arm sore afterward!


I

  • I collected the buttons as well as everything I pulled off of the chair and put it all in a safe place, so that I could use some of it again as a template to cut my fabric.


  • My chair had another section of fabric in the front of the chair, which I removed as well.


=
 I'm afraid that I did a poor job of documenting from this point forward, but I'll do my best to tell you the details.

RECONSTRUCTION
  1.  First, I spray painted the chair in high-gloss black.  I like to use Krylon spray paint.  As I like to remind my readers, you will get the best result with multiple light layers.  Do not spray too closely and do not spray too much or you will create a mess.  You do not need to sand if you are using spray paint.  Instead vacuum and wipe-down the piece with a swifer dry cloth.
2. Meanwhile, I began working on the piping or cording.  This became the most tedious and time-consuming step and almost made me quit in despair!  My chair had double cording on the front and back.  I spent countless hours churning out the cording, which I ended up doing incorrectly.  Apparently in the upholstery world, the double piping is called "double welt cording," and there is a very specific way to do it.  Fortunately, I had Censational Girl's tutorial, which was a major help. (http://www.centsationalgirl.com/2010/12/simple-sew-double-welt-cord/) I will say that if you are not a competent seamstress, this is probably not the best project to try until you get some sewing experience under your belt.

3.  After I finished the double welt cording, I began the cording for the cushion, which I decided to do in black.  Fortunately, I had both the green and black fabric on hand, so I didn't purchase either.  I did end up buying about 20 yards of cording because I made so many mistakes.   For a basic cording tutorial, also see Centsational Girl's, "The King's Chair."  She does a much better job explaining!
 During this step, the pieces of fabric that I had ripped from the old chair came in handy to show me how to construct the cushions and how long to make my cording.  I used the foam from the chair cushion to draw a pattern for the top and bottom of my cushion.  I will not go into how to sew a cushion; I'm afraid you'll have to search the internet for advice!

4. Once my cushion and double welt cording were made, it was time to re-assemble the chair.  This part was the easiest and most fun. Cutting pieces of fabric for the upholstery is not like measuring and cutting for something like a cushion; it needn't be exact.  I used the fabric that I had pulled from the front, back and bottom front of the chair to cut out fabric pieces in similar size.  It doesn't need to be exact because you will not being sewing these pieces together but rather, stapling them to the chair.  Your double welt cord will cover the staples.

5. Covering the buttons:  I did a terrible job with this.  I know you can purchase a kit that enables you to cover button, but I took a short-cut--and it shows if you get close enough to the chair--and used my existing buttons.  I put hot glue, from my glue gun, all over them and wrapped my black fabric around the buttons gluing it on the back.  The buttons have a funky shape.  I'll do better next time!

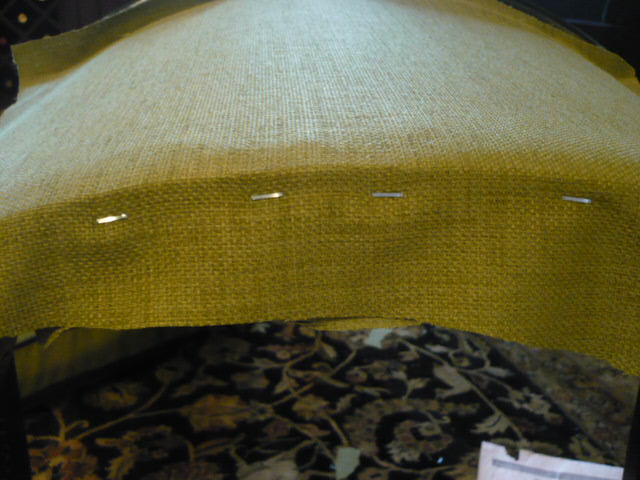
6.  Staple your fabric to the chair.  I had to do the front of my chair first because I had tufting.  As with re-covering dining chairs, I like to make a staple at the top, then a staple at the bottom in order to secure the fabric, then go from there.  The thing to remember is that you don't want the fabric too tight or too loose, so be mindful of this when stapling.  I did make small button holes on the fabric that went on the front of the chair as my buttons we attached to metal that was to be pushed through the fabric; this worked well.


7.  After completing the front, I started on the back.  Again, stapling the top, then bottom and going from there.


8.  Tip:  Try to get your staples flush with the chair.  If the staples are sticking up too much, you can either use a hammer to knock them flush or you can use pliers to pull them out.  I removed many a staple with my pliers during this project.

9. Tip:  After stapling the fabric, I found that I was either going to need to trim the excess fabric or turn it over and staple it down.  When I tried to trim it with scissors, the spray paint ended up being scraped from the chair, so I found it better to fold over excess fabric and staple it.  You will be covering it will double welt cord.
10.   Once all the fabric was securely staples, I used my glue gun to attach the double welt cord to the chair.  This is fun, but glue in small sections moving slowly.  After putting the glue on the chair, I would run my index finger along the seam between the cords pushing it down into the chair.  In my excitement, I forgot to take pictures!

11.  Voila the finished project!  I can't believe I survived my most difficult DIY to date!

 Before:


After:


xo-
Carson