Showing posts with label reupholstry. Show all posts

Wednesday, September 21, 2011

How to Reupholster a Stool


Earlier this year, I posted about two cross-bar stools.  At the time, I spray painted the legs black, but knew that I eventually wanted to recover them.  I am embarrassed to say that I never finished the post; therefore, I started where I had left-off finishing this project just prior to the birth of baby #2.  Though that was 6 weeks ago, I'm just getting around to publishing the post.
________________________________________________________________

My sister-in-law, who is an interior designer/owner of Kathryn Robertson, suggested that I get cross bar stools to put in front of my fireplace.  What a great idea!  Only....I could not find affordable upholstered stools.

I felt confident that I could find an alternative and found great stools for $60 each at Sears/Kmart. 
Not a bad deal!  I never liked the cherry finish, so I spray-painted them with high-gloss black Krylon spraypoint.  (Sorry-I deleted pictures of the stool!)

About two months ago, I was at U-Fab and spotted the perfect fabric for these stools, which I purchased, but they remained uncovered until last week.  In an effort to distract myself from the impending birth of baby #2, I decided to bite the bullet and recover the stools.  The process ended up being easier than I thought:

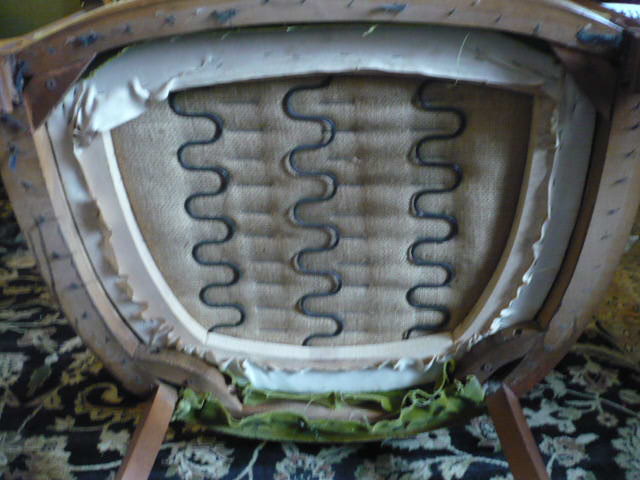
As with any reupholstry project, begin by deconstructing the furniture noting how the piece was put together.  Taking pictures is a good idea for helping you remember how to re-assemble the piece.

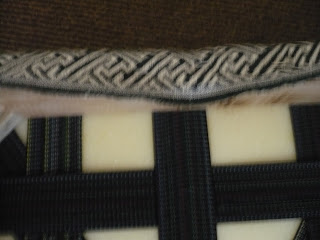
First, I removed the legs, then I removed the black fabric that lined the bottom of the stools.


Next, I used scissors and pliers to remove the leopard fabric.  The original stools were tufted, and when I began the reupholstry project, I thought I would tuft my stools, but ended-up deciding again it.  If your stools are tufted, pay careful attention to how the buttons are attached to the bottom of the stool.


 I tried to remove as much of the fabric and staples as I could, but it was difficult to get it all.
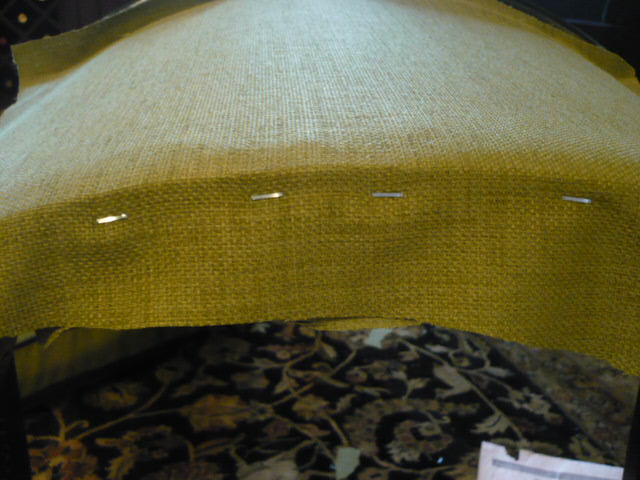
Next, I cut my two yards of fabric into two, one-yard pieces.  I centered the foam wrapped frame on top of the fabric (upside down) being sure to line-up the pattern--just eyeballing it.

Next I stapled a center staple on all for sides making sure to fabric had equal tension on all sides and that the pattern was straight.  Next, I added many staples to the sides until I got near the corners.

Decide how you want your fabric to fold at the corners--play around with it a bit--then pick a method for folding.  Use the same method for folding on every corner.


Be sure to cut back the fabric so that is doesn't cover the holes where you will re-attach the legs of the stool:

This project didn't take too long since I decided not to tuft the stools.

Here are the before and after stools pictured together:

After:


Thanks for reading!
Carson


Wednesday, February 23, 2011

Reupholstering /Slipcovering an Ottoman


I've given this post this strange title of Reupholstering/Slipcovering because I'm not exactly sure what my project can be classified as.  Essentially, I've created a slipcover for my ottoman, but instead of sewing a skirt on the bottom, I've stapled the fabric to the bottom of the ottoman as if I were reupholstering.  I suppose I'm doing a little of both.

I'm afraid I didn't write down what I was doing as I was doing it, so it is a bit difficult to remember at this point.  This will be a very rough tutorial.

This is how I made it:

This fun geometric fabric came from U-Fab in Richmond, Virginia; I purchased 4 yards.

Next, I measured all the sections of the ottoman.  Essentially, the slipcover would be a bunch of rectangles sewn together with piping in between.  Then I created a sketch with the measurements.


I added 1/2 an inch (the seam allowance) to each side of the rectangle.  For example, if the ottoman section measured a 16 x 6, I would cut-out a 17 x 7 piece of fabric.  The bad thing about using a patterned fabric is that you need to match your patterns, which can be difficult, but the good thing was that I used the geometric lines to guide me in cutting out my rectangular pieces.  Also, I noticed that on the bottom section of my ottoman, the fabric was tucked in between the cushions.  I stuck my measuring tape in there and guessed about how much fabric was stuffed back there,  I think I added about 5 inches (height) to these rectangular pieces.
After I cut out all the rectangular pieces, I made the cording.  I hate making cording and probably couldn't give you a good tutorial, but here is a step-by-step guide to making cording.

I worked in sections.  First I sewed the cording to the top rectangle.  Then I added the side rectangles to the top.  Then, I added cording to the side pieces, then I added the bottom pieces.

I usually pinned the pieces together while the fabric was on the ottoman.  Sometimes I found it easier to do this with the fabric inside-out.


 Finally, I took the legs off the bottom, stapled the fabric to the bottom and then put the legs back on.  Then I stuffed the extra fabric between the top and bottom ottoman cushions.


Voila!  A slipcovered ottoman--not perfect, but it will do!

xo-
Carson

Tuesday, January 18, 2011

Reupholstering the Green Chair


I love this chair.  My parents bought it when they were first married; I remember it always being in their house. Recently, I asked if I could have it because I thought it would look good in our den.  It had been living in a back bedroom, so they were okay parting with it. I really do like it just as it is...HOWEVER, I wanted a new DIY project, and there is some staining on the cushion....so I decided to take the plunge and try my hand at reupholstering.  Don't get me wrong; I was completely intimidated by this project, but was inspired by my favorite blogger, Kate, otherwise known as Centsational Girl: http://www.centsationalgirl.com/


This past weekend Kate changed this chair, from this:


To this:


Here's How I Reupholstered My Green Chair:

DECONSTRUCTION
  • First, you will need to deconstruct the chair.  You should probably allow 1-2 hours for this step.  I flipped over my chair and found black cloth covering the bottom, which was stapled to the chair.   

  • I pulled off the black and removed a handful of the staples.  *Important:  I took pictures of each step and wrote down a description of each step in order to help me put the chair back together!  After removing the black fabric, I gained a real understanding of how the chair was constructed.  I found found four screws (one at each corner.)  Once I removed these, the chair "cover" popped out.  


  • Then I ripped off the cording all over the chair which was attached with glue followed by the fabric.  The fabric was a bit more difficult to remove.  I used a flat-head screwdriver and pliers to remove as many staples as possible.  This took a good bit of time--boy was my arm sore afterward!


I

  • I collected the buttons as well as everything I pulled off of the chair and put it all in a safe place, so that I could use some of it again as a template to cut my fabric.


  • My chair had another section of fabric in the front of the chair, which I removed as well.


=
 I'm afraid that I did a poor job of documenting from this point forward, but I'll do my best to tell you the details.

RECONSTRUCTION
  1.  First, I spray painted the chair in high-gloss black.  I like to use Krylon spray paint.  As I like to remind my readers, you will get the best result with multiple light layers.  Do not spray too closely and do not spray too much or you will create a mess.  You do not need to sand if you are using spray paint.  Instead vacuum and wipe-down the piece with a swifer dry cloth.
2. Meanwhile, I began working on the piping or cording.  This became the most tedious and time-consuming step and almost made me quit in despair!  My chair had double cording on the front and back.  I spent countless hours churning out the cording, which I ended up doing incorrectly.  Apparently in the upholstery world, the double piping is called "double welt cording," and there is a very specific way to do it.  Fortunately, I had Censational Girl's tutorial, which was a major help. (http://www.centsationalgirl.com/2010/12/simple-sew-double-welt-cord/) I will say that if you are not a competent seamstress, this is probably not the best project to try until you get some sewing experience under your belt.

3.  After I finished the double welt cording, I began the cording for the cushion, which I decided to do in black.  Fortunately, I had both the green and black fabric on hand, so I didn't purchase either.  I did end up buying about 20 yards of cording because I made so many mistakes.   For a basic cording tutorial, also see Centsational Girl's, "The King's Chair."  She does a much better job explaining!
 During this step, the pieces of fabric that I had ripped from the old chair came in handy to show me how to construct the cushions and how long to make my cording.  I used the foam from the chair cushion to draw a pattern for the top and bottom of my cushion.  I will not go into how to sew a cushion; I'm afraid you'll have to search the internet for advice!

4. Once my cushion and double welt cording were made, it was time to re-assemble the chair.  This part was the easiest and most fun. Cutting pieces of fabric for the upholstery is not like measuring and cutting for something like a cushion; it needn't be exact.  I used the fabric that I had pulled from the front, back and bottom front of the chair to cut out fabric pieces in similar size.  It doesn't need to be exact because you will not being sewing these pieces together but rather, stapling them to the chair.  Your double welt cord will cover the staples.

5. Covering the buttons:  I did a terrible job with this.  I know you can purchase a kit that enables you to cover button, but I took a short-cut--and it shows if you get close enough to the chair--and used my existing buttons.  I put hot glue, from my glue gun, all over them and wrapped my black fabric around the buttons gluing it on the back.  The buttons have a funky shape.  I'll do better next time!

6.  Staple your fabric to the chair.  I had to do the front of my chair first because I had tufting.  As with re-covering dining chairs, I like to make a staple at the top, then a staple at the bottom in order to secure the fabric, then go from there.  The thing to remember is that you don't want the fabric too tight or too loose, so be mindful of this when stapling.  I did make small button holes on the fabric that went on the front of the chair as my buttons we attached to metal that was to be pushed through the fabric; this worked well.


7.  After completing the front, I started on the back.  Again, stapling the top, then bottom and going from there.


8.  Tip:  Try to get your staples flush with the chair.  If the staples are sticking up too much, you can either use a hammer to knock them flush or you can use pliers to pull them out.  I removed many a staple with my pliers during this project.

9. Tip:  After stapling the fabric, I found that I was either going to need to trim the excess fabric or turn it over and staple it down.  When I tried to trim it with scissors, the spray paint ended up being scraped from the chair, so I found it better to fold over excess fabric and staple it.  You will be covering it will double welt cord.
10.   Once all the fabric was securely staples, I used my glue gun to attach the double welt cord to the chair.  This is fun, but glue in small sections moving slowly.  After putting the glue on the chair, I would run my index finger along the seam between the cords pushing it down into the chair.  In my excitement, I forgot to take pictures!

11.  Voila the finished project!  I can't believe I survived my most difficult DIY to date!

 Before:


After:


xo-
Carson